Quick Facts
Introduction
Don't let the sheer number of abilities in this encounter intimidate you. You can make steady progress, and chance plays virtually no role. The longer a Paragon remains in fight, the stronger they become. Active Paragons in the arena gain +8 % damage every 30 seconds. Abilities that deal little damage at the start will therefore become dangerous later on if you keep this Paragon alive for longer. (Note: The Dungeon Compendium claims 50 seconds, but logs from that time show 30 seconds).
First, all the Klaxxi and their abilities are described, and then they are put into context during the fight. In our experience, this encounter is slightly easier than Blackfuse, but it takes a very long time. Fights lasting 10–12 minutes were not uncommon. The Berserk Mode starts at the 12-minute mark, at which point the remaining Klaxxi receive a massive damage buff. We won’t go into the differences from Normal Mode, as they are quite extensive. You can use the same order and tactics in your first Normal Mode runs to get a head start on preparing the Heroic encounter.
If the Old Ones ever return, we Mantid will once again stand by their side.
— Kil'ruk the Wind-Reaver
Next time, maybe think twice before freeing weird bees from their honey prison, because then you’d already be with Garrosh and wouldn’t have to look at three dozen abilities.
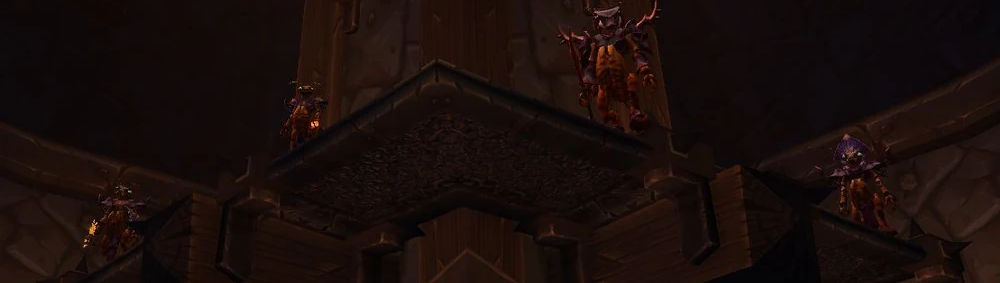
The Klaxxi
The order in which the nine Klaxxi enter the arena is fixed. If it seems odd to you that the last boss to appear increases the
damage taken by the tank from a previous boss who has long since died:
At the beginning, the order was randomly determined each week. However, this was changed to a fixed order more or less immediately.
There is always a maximum of three bosses involved in the encounter at any given time. If you kill
one, the next one takes its place until there are none left. Which boss you tackle next is always a balance between
how long that particular Klaxxi has been in the fight and its abilities. This means that you’ll let some Klaxxi live for a long time and only
kill them when they deal significantly increased damage, while killing others immediately upon entering the arena,
because they have abilities that have too great an impact on the fight.
If you find that you’re having trouble with a particular part of the fight due to your setup or specific group composition,
you can easily adjust the kill order and usually swap two Klaxxi with each other.
After one of their allies dies, the remaining Klaxxi fully heal themselves, and the dead Klaxxi drops an ability that a player can pick up and use via the Extra Action Button. These are referred to below as EAB Abilities. The role that can pick up the buff is listed in parentheses after the ability name. In addition, the bosses have 2–3 regular abilities.
The following list of bosses is in the order in which they enter the arena. Note that the damage numbers listed are only the base values. Since active bosses become 8 % stronger every 30 seconds, some abilities can deal up to 50 % more damage as the fight progresses.
Skeer
He must be tanked.
Ability: Hew
This prevents tanking both Rik'kal and Skeer simultaneously. The debuff has no duration and only fades when Rik'kal dies.
Ability: Bloodletting
Blobs can be slowed and stunned and have approximately 6.2 million health points. However, you will never kill them, as explained in the strategy chapter.
EAB Ability: Bloodthirsty (DPS)
Rik'kal
He must be tanked.
Ability: Genetic Alteration
Ability: Injection
You will let the first debuff in the fight go through and then prevent all subsequent ones via active mitigation, as one wave of Parasites is needed to handle the Mutate ability explained below. You should not let the Parasites roam freely all the time, as they will otherwise target random players with Feed, which deals just over 100 k nature damage per second to a player.
Ability: Mutate
The Scorpion has four abilities on its action bar. Abilities 1–3 deal damage. In terms of priority, use 3 first (a poison DoT), then 2 (a frontal AoE with bonus damage to poisoned targets), and by default 1 if the other two abilities are not ready.
At any point during your transformation, you must approach a Parasite and eat it with ability 4; otherwise you will die when your transformation ends.
You may be required by your raid lead to eat two Parasites. In that case, eat one immediately after your transformation and another one after the 12-second cooldown expires.
In Scorpion form, you deal significantly less damage than in your natural form. If you’re lacking damage during this phase, a Mage can cast Alter Time. They will then get taken out of the Scorpion if they get targeted by the ability.
EAB Ability: Mad Scientist (all)
Keep the poison (3) on the target and press your 2 as often as possible, as that is your biggest source of damage (triple damage to poisoned targets). You should also use the 4. It no longer devours an Amber Parasite but instead deals the second-highest amount of damage. It channels onto your target, but you can continue with your rotation in the meantime.
Our Brewmaster, who tanked Ka'roz, cast the ability at around 3:30 and 7:30 into the fight. You can significantly optimize this, though it will also put more strain on your healers.
Hisek
Hisek doesn't need to be tanked and stays stationary in the centre of the arena.
Ability: Multi-Shot
Ability: Aim
If you cannot take or prevent the effect on your own, players must stand in the beam with you, but at least 5 yards apart, otherwise there will be an additional 135,000 damage dealt via Sonic Resonance to these players. At least three additional players should stand in the beam. If you stand too close to Hisek when he targets you, you will be knocked back 45 yards.
Heroic Ability: Rapid Fire
EAB Ability: Snipe (DPS)
Ka'roz
He must be tanked.
Ability: Flash
You should also never let the boss Flash through the tanks. As ranged players, spread out on one side of the boss rather than facing each other with the boss in the middle.
Ability: Hurl Amber
The puddles remain until the end of the fight.
EAB Ability: Strong Legs (DPS)
Korven
He must be tanked.
Ability: Encase in Amber
The standard tactic is to bring Korven and another boss to just over 50 % HP and then bring the other boss below 50 %. The other boss now gets trapped, and during the ability’s 30-second cooldown you'll quickly kill Korven.
In theory, the amber prison can be removed by Ka'roz's EAB Ability Strong Legs, but in the standard strategy, you haven't killed Ka'roz at this point yet and thus no access to the ability.
If, hypothetically, you were to kill Korven as the last of the Klaxxi, you would either have to bring him from 100 to 0 within the 20-second window after his full heal or remove the amber prison with this ability.
Ability: Shield Bash
EAB Ability: Master of Amber (Tank)
Iyyokuk
Iyyokuk must be tanked and only deals moderate damage to the tank itself with melee attacks.
Ability: Diminish
Ability: Insane Calculation: Fiery Edge
When the beams appear, they flash for three seconds. During this time, you have a chance to reposition yourselves. Then the beams deal damage for 7 seconds. No one should be standing in a beam, as it causes extra damage. Furthermore, the bonds deal unavoidable damage the closer you stand to targets to which you are connected. So spread out beforehand and immediately (!) adjust your position slightly after the bonds appear so that you do not stand in the path of a connection between two other players. You are connected to multiple players, creating a sort of web.
For the later Insane Calculations, you will need healer cooldowns, as they deal a lot of damage after Iyyokuk has been in the arena for an extended period, even if no one is standing in the beams.
EAB Ability: Ingenious (Healer)
Xaril
He must be tanked.
Ability: Tenderizing Strikes
Ability: Caustic Blood
Active mitigation completely prevents the debuff from being applied; you should never receive it.
Ability: Toxic Injection
- Orange (Red/Yellow): Players emit a large circle from themselves, like a Priest’s Halo. This deals damage in a radius of approx. 12 y, but its animation is much larger. Affected players must immediately run to the edge of the arena and also keep their distance from one another.
- Green (Blue/Yellow): Poison puddles appear beneath affected players and move around slowly. Place them on the outer edges. The puddles tick and also leave a DoT. Puddles disappear after three ticks, but you don’t have to soak them, so stay out.
- Purple (Red/Blue): After a few seconds, you will automatically move forward, creating a purple trail behind you.
After a few more seconds, you can move normally again, and the trail deals damage on contact.
Run towards the edge of the arena and spin in a small circle while dragging the trail behind you. It won't deal any damage yet.
Just before your debuff ends, run out of the condensed trail you created so you don’t take damage from it.
Tanks can also be targeted by this ability.
EAB Ability: Vast Apothecarial Knowledge (Healer)
Kaz'tik
Kaz'tik doesn't need to be tanked in the traditional sense; he doesn't deal direct damage to his target. See the Sonic Projection for more details.
Ability: Sonic Projection
Ability: Kunchongs
Kaz'tik regularly casts Mesmerize on a player, causing them to run towards one of the Kunchongs. The player cannot act during this and dies if they reach the Kunchong. The Kunchong, which temporarily loses its shell in the process, must now take 25 % damage before it will let go of the player. While under the Mesmerize effect, the Kunchong gains 7 energy per second, which it retains even after the effect ends.
If it reaches 100 energy, it will stop targeting the player, transform, and must be tanked. It has a frontal cleave attack. It retains its health points after transforming, so it does not heal itself. Do not stand close to it during the first few seconds after its transformation, as it does not immediately have a regular threat table.
You can pull players back with Leap of Faith and also encase them in amber using Korven’s EAB Ability, giving you some time.
If you aren’t very quick to switch targets and the same Kunchong targets a player twice, that Kunchong will transform because it only takes about 15 seconds in total to reach 100 energy. This means you’d have to remove 25 % of its HP (5 million) within 7.5 seconds twice, which is unrealistic. So include in your plan that you’ll likely have to kill a Kunchong.
Always stay at a distance from the Kunchongs so you have enough time to react.
EAB Ability: Master of Puppets (anyone)
Kil'ruk
He needs to be tanked and causes massive damage to tanks.
Ability: Razor Sharp Blades
As mentioned above, Kil'ruk deals enormous damage to tanks because he uses this ability with both hands. Three hits within 1.5 seconds for 600 k damage each are not uncommon.
Ability: Gouge
Unlike the Gouge in the Protectors fight, this cannot be prevented by turning your back on the boss.
Ability: Death From Above
Heroic Ability: Reave
EAB Ability: Reave (DPS)
Encounter Strategy
The following is a description of the different phases of the encounter. A new phase always begins when you defeat a boss. The heading always lists the currently active bosses. The number in parentheses indicates how many phases the boss has been in so far. Bosses that have just entered the arena are prefixed with a plus sign. The boss you are about to defeat is underlined.
1. Skeer (1), Rik'kal (1), Hisek (1)
The goal of this phase is to kill Skeer and manage his Blood Blob ability. To do this, you’ll need to reduce Rik’kal’s HP to about 90 % and then
use your cooldowns to kill Skeer. The Blood Blobs that appear should all move towards Rik’kal. If that doesn’t work, you’ll need to
deal damage to him for a little longer at the start.
Before or shortly after Skeer creates
Blood Blobs for the second time, you should have killed him. You can pull him into a corner of the arena to buy yourself a little more time.
You can briefly prevent the Blobs from reaching Skeer using CC. If, after some practice, you are unable to kill Skeer in time before the second Blobs arrive,
you might consider using Bloodlust. Be warned, however, that you will likely face problems in future phases as well.
This is a clear sign that your damage output is too low.
During this phase, you’ll have to deal with the Amber Scorpion mechanic and Hisek’s Aim and Rapid Fire. Since you’ll be pulling Skeer to the edge of the arena, you won’t be close to Hisek anyway, so the Rapid Fire (the projectiles he fires in all directions) shouldn’t be a problem. Position yourselves in the beam of players who are targetted by Aim. If they can handle it on their own, they should do so.
At the start, the Rik'kal tank allows the Injection Debuff to apply once by not having an active mitigation up. Then they should let it wear off, and five Amber Parasites will join the fight. By the time Rik'kal dies in the next phase, players will have been transformed into an Amber Scorpion three or four times. This means one or two players must consume two Parasites instead of one. Plan this after the first few attempts, once you can estimate your damage output. To start, you can have only the third player consume two Parasites. If there's no fourth player turned into a Scorpion, quickly switch to the remaining Parasite to kill it “manually”.
- 0:00 Attack Rik'kal and get his health down to 90 %. Pull Skeer into a corner.
- 0:08 The Rik'kal tank allows the Injection Debuff to apply once by not using active mitigation.
- 0:10 Switch to Skeer, use CDs.
- 0:20 The debuff on the Rik'kal tank expires, and five Parasites spawn.
- 0:22 Player 1 mutates and eats a Parasite.
- 0:37 The first Aim is cast.
- 0:53 Player 2 mutates and eats a Parasite.
Sometime between the last two entries, new Bloods will spawn.
2. Rik'kal (2), Hisek (2), +Ka'roz (1)
You will now kill Rik'kal, since the Mutate/Parasite combo would end up costing you far too much damage in the long run and also requires a lot of effort. As mentioned above, after a few attempts, you should have figured out which players will eat two parasites.
From this point on, Ka'roz will be in combat for an extended period and will use his Flash/Whirling combo from time to time. To best deal with his Hurl Amber, you can place four world markers around the centre of the arena before the fight. This is where ranged players will gather shortly before the ability to place the puddles inside each other.
3. +Korven (1), Hisek (3), Ka'roz (2)
Korven enters the arena and is, of course, your primary target right away because you don’t want to see his “Encase In Amber” ability
more than once. Bring Korven and Hisek down to just over 50 %. Then bring Hisek below 50 % until Korven casts “Encase In Amber” on him and use
all your cooldowns on Korven. Of course, you could also bring Ka'roz down to 50 %, but he is often “unavailable” because he is
dashing around or heading to the platforms to Hurl Amber.
The tanks always taunt Korven after Shield Bash.
If you repeatedly fail to kill Korven in time, you can use Bloodlust here. Ideally, though, you should play without it.
4. Hisek (4), Ka'roz (3), +Iyyokuk (1)
By now, Hisek should be dealing about 64 % more damage due to his long presence in the arena, which is becoming noticeable by his Multi-Shot and Aim damage. That's why he's your next target. Iyyokuk will attack you with his Fiery Edge, which doesn’t cause too much damage at the start. Once you’ve figured out from your attempts how many Fiery Edges you get, you should assign healing cooldowns.
5. +Xaril (1), Ka'roz (4), Iyyokuk (2)
Now is the moment when you’ll put your Bloodlust to use. Your goal is to kill Xaril before he uses his Toxic Injection for the second time. Use the EAB Ability that Hisek just dropped to deal +15 % damage to the boss for 10 seconds.
6. +Kaz'tik (1), Ka'roz (5), Iyyokuk (3)
Even though Ka'roz's bonus damage seems alarmingly high by now, you'll need to kill Kaz'tik so you can get through the “Kunchong Phase” as quickly as possible. Have either one of the tanks hold Kaz'tik's aggro or have a ranged DPS pull him out of the group so his projectile doesn't keep getting fired towards the raid. Always break the Mesmerized players out of their trance immediately and kill the mutated Kunchong that you will likely encounter.
Alternative: Kill Iyyokuk and let Kaz'tik live for one more phase.
You might want to consider this if the Fiery Edge is causing you too much trouble.
Depending on your damage output, you have several options for dealing with the Kunchongs. To start, you should
immediately free the Mesmerized players by dealing damage to the Kunchong and kill it when it reaches 100 energy and gets transformed.
You can decide, depending on when the next Fiery Edge is about to be cast,
whether to free the player or use Korven’s EAB Ability to encase them in amber. This gives you a few more seconds to focus on Iyyokuk and kill him before his next
Fiery Edge. If you don’t get an additional Fiery Edge and instead only have a Kunchong that you need to kill, that can be a good trade-off.
7. Iyyokuk (4), Ka'roz (6), +Kil'ruk (1)
Now you must kill Iyyokuk, otherwise his Fiery Edge will gradually become unhealable. Kil'ruk will enter the arena and deal massive damage to tanks, also casting Death From Above and Reave (the pull effect). Kil'ruk cannot be tanked by the tank who previously tanked Xaril, because they still have the debuff that causes them to take additional damage from Kil'ruk.
8./9. Kil'ruk (2), Ka'roz (7)
Here, you can decide who you want to kill first. We chose Kil'ruk back then because, despite having only recently entered the arena, he had killed the tank several times. The advantage of letting Ka'roz live is that his Hurl Amber and Flash/Whirling can be completely avoided. Despite likely having a damage bonus of around 140 % by now, he still only deals about as much damage as Kil'ruk when he's on the tanks. All players must learn how to dodge Ka'roz abilities properly in each case, because they're pretty deadly already since a couple of phases.
Kill Video
This video is our first kill from March 10, 2014, as seen from our Brewmaster's perspective.
Common Reasons for Wiping
- Avoidable Damage: One-hit mechanics such as Death From Above or, later on, Ka'roz's Flash/Whirling.
- Fiery Edge: Be sure to assign healing cooldowns for this.
- Focus Damage: Uncompromising focus damage must be directed at Skeer at the start and later at Korven and Xaril.
- Tank Deaths at the Very End: Allocate all available cooldowns to help your tanks survive.
TL;DR
- There are way too many abilities and mechanics to cover here. Be sure to read through everything!
- Tanks: Coordinate which bosses you want to tank.
- Healers: Plan your cooldowns for the Fiery Edge.
- Being the Scorpion: Ability priority: 3 > 2 > 1. Eat a parasite (ability 4) within the 20-second duration, or you will die!
- Kill order: Skeer, Rik'kal, Korven, Hisek, Xaril, Kaz'tik, Iyyokuk, Kil'ruk, Ka'roz.
- At the start, bring Rik'kal below 90 %, then focus all damage on Skeer. Later in the fight, focus all damage on Korven and Xaril.
- As soon as Korven appears, bring him and Hisek to just over 50 %, bring Hisek below 50 %, and kill Korven as soon as Hisek is encased in amber.
- Assign players for the extra abilities from the boss corpses. Important abilities: Hisek (15 % damage boost for 10 seconds on a boss), Korven (encases players in amber), Kaz'tik (turns into a scorpion, let it use a tank with vengeance!).
Class Tips: Rogue
If Aim is cast on you, you can neutralize it with
Vanish.
You won't be able to move for a few seconds,
but you can use Shadowstep to get back to the boss.
The talent Elusiveness helps you,
for example, to reduce the damage from Fiery Edge.
Otherwise, for once, this isn’t a fight where you’ll make extensive use of
Feint and
Cloak of Shadows.